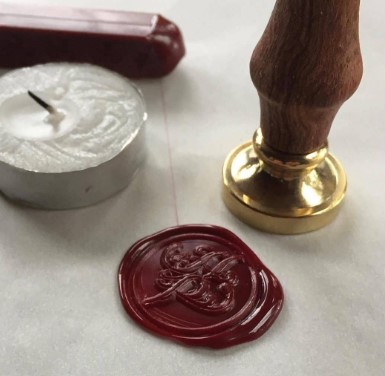
The wax seal looks interesting and attractive, nowadays it is used as a master stamp, for decorating envelopes, scrapbooking, etc. If you are a lover of needlework, you would probably like to have your own sealing wax, which you can use as your mark.
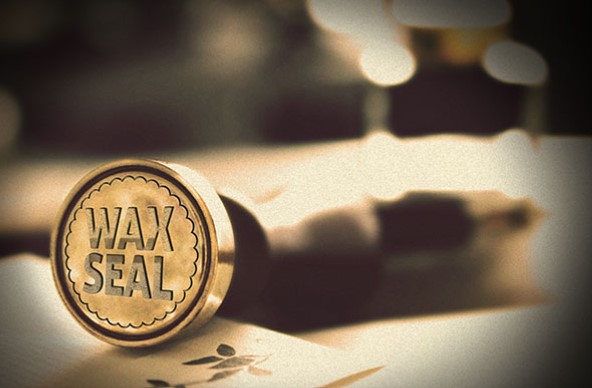
We found for you a master class on how to make wax seals at home. This master class is more suitable for already experienced mistresses, who know how to work with the material, tools and melting wax.
How to Make Wax Seals
Hot wax, resin or wax seal is a great decoration that can be used for scrapbooking, and in various types of decoupage, and in many other types of needlework. To create it, you will need:
- a wax stick to print on;
- a device for wood piercing;
- a thin sharp knife or a stationery knife;
- printout;
- sandpaper;
- oiling agent;
- pencil.
A wooden stick for a shovel, mop and so on, such can be purchased in a regular construction store or in a hardware store, will be suitable for creating wax seals. Choose a wax stick of the right diameter for you.
Wax Sticks with Wicks
So, how to make a wax seal at home? Saw off a piece of wax stick, about 5-6 cm long. Guided by your hand, measure such a piece, which will be convenient to use. Grind wax stick well from all sides. Be careful with the one on which you are going to print.
Make a printout with an uncomplicated image to print, suitable in diameter. Cut it out in a circle, then use a thin knife to cut through the design, making a stencil out of the printout.
Mirror the design onto the surface of the future print, so that the print is the correct impression – from right to left. Use a pencil to paint the cut out holes, do it carefully. You can secure the stencil with a small piece of scotch tape to keep it from wobbling.
Next, take care of the burning. Heat up the wood burning device, try to burn the image at the same depth, so that the print is even and clear.
Treat the finished print with olive oil or other special moisture-resistant wood impregnation. Carefully wipe the place with a rag and leave it to dry for 24 hours, otherwise it will stain your hands. Here’s how to make wax seals at home. In a day it can be safely used.
Test drive
Now you can try the finished seal in business. Take wax, sealing wax, or other material suitable for printing (we’ll talk about alternative printing materials below), spread it out with a candle or lighter, drip it in the area where you want to place the seal. Allow a few seconds for the material to set.
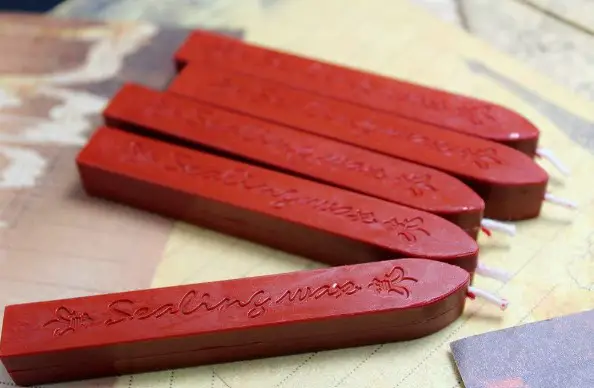
Dip the seal in regular oil, blot the excess with a tissue paper. Press it evenly and firmly onto the material and leave it until it hardens.
When it hardens, gently remove the seal. If you are afraid of damaging it, rock the seal a little so that it will come off inside a little. Once lifted, you’ll get a neat, beautiful print created with your own hands. A homemade wax seal is ready.
Imitation
It is worth saying that the wax seal is already a common combination of words, because now they call it any seal, made not only of sealing wax, but also of other alternative materials, perfectly coping with the task assigned to them.
Masters, who are fond of scrapbooking, shared with us their findings and ideas. How to make a seal indistinguishable from the material at hand? If you are interested, then let’s see how to make wax seals at home from simple materials, which probably have lovers of needlework.
Hot Glue Seals
If you’re into scrapbooking, then you’re sure to have a glue gun and a pair of rods. Great stuff for imitating wax seals with your own hands at home. Let’s try it.
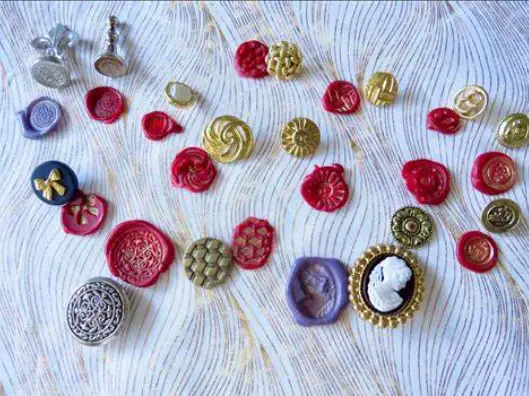
Take a ready-made seal, you can also use various stamps, coins and buttons. Turn on the glue gun and heat it up, drip the glue of your desired size on the place where you want to make a seal. Don’t be stingy, the seal should come out thick. Allow 20-30 seconds for the product to harden.
Apply the stamp, coin or seal, and let it dry. After removing the coin, the stamp can be painted with acrylic paints or from a spray can. You can also use colored glue sticks.
Glue Gun Wax
Here’s another way to make a wax seal at home. Wax pencils are weaker than wax, but they are a great alternative and much better than glue because you don’t have to paint them.
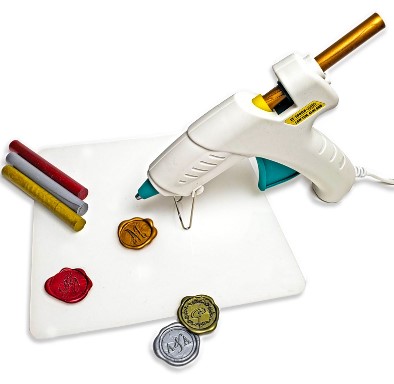
Remove the wrapper from the wax pencil and put it in the gun. You can also melt it with a lighter or candle, but a glue gun will make it much neater. One disadvantage of this method is that the gun will be unusable for glue, but it can be used further for wax.
After making a small drop on the desired spot, allow the wax to harden a bit. Also, lean any stamp on it. When it dries, you will have a great stamp.
You can melt an ordinary colored candle in the same way.
Modeling Mass Prints
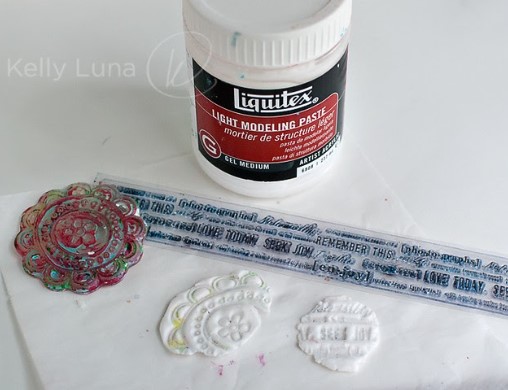
Another material you can use to create a cool seal is modeling paste. All you have to do is roll out a small, even pancake of the mass, apply a seal or coin, pressing it down well. And then bake it in the oven according to the instructions on the mass packet. The seal is strong and resistant. It is perfect for decorating various items.
More and more often, brands and handmade women are ordering wax seals with their logos. But some have a fear of not being able to create beautiful prints. It is easy and fast to make an imprint with a spoon, glue gun and polymer sealing wax. Below we’ve compiled tips and advice on how to use a wax seal and what you’ll need for the job.
Why do I Need a Wax Spoon
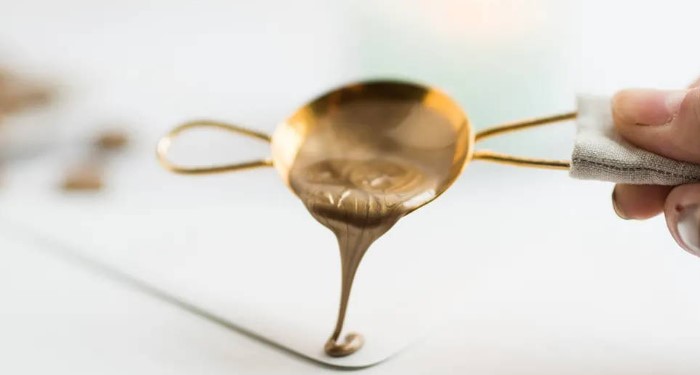
People often have a question: Why do we need a spoon when we use sealing wax? In fact, the spoon is used to make even sealing wax impressions. It heats the sealing wax evenly and makes it easier to put a sealing wax stamp on it.
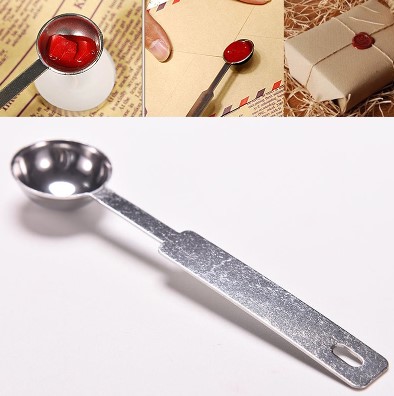
When the candle runs out, it is inconvenient to drip it onto the surface. Put the rest of the sealing wax in a spoon and heat it until it is liquid. They also make marbled impressions with it, mixing different shades and adding glitter to the mix. If you take a large spoon, you can put several impressions at once.
How to Make Wax Seals Stamps With a Spoon
Decide on the form of sealing wax to put the wax stamp with a spoon. It can be in pellets, with a wick, or in rods. You can order a special sealing wax spoon. It has a special spout, with which it is convenient to pour the mass on an envelope or package. Also each size of the sealing wax spoon is designed for a different diameter of the wax seals. The small size is for wax stamp of 20, 25, and 30 mm.
And the large and medium are for sizes 35 and 40 mm. Or they will fit two or three small diameters. If you don’t have such a spoon, use an old teaspoon. You will also need a candle, a burner or a melting stand to work with sealing wax, you won’t have to hold the tool in your hands.
To start, measure out 1 cm of sealing wax or put 3-4 pellets in a spoon. Hold the tool over the fire so that the flame does not touch the bottom of the spoon, otherwise you will get soot on the bottom, which will interfere with production. Pour the sealing wax in a “thick sour cream” state. If the mass is liquid, it will spread on the surface, and the sealing wax stamp will not be perfectly round.
Take care that the sealing wax does not boil or smoke, it can change color if heated at high temperatures. Stir the bubbles on the surface with a stick and let cool.
After you have poured the sealing wax, place the seal on top. Wait 30 seconds. Make sure the material has hardened and remove the wax stamp. The wax stamp is ready. Now you can decorate the wax stamp with a marker, highlight the entire image or logo in silver.
If you have finished working with one color and want to remove the excess sealing wax from the spoon, heat it over the fire. When the sealing wax is melted, gently wipe the metal with a paper towel. Repeat the procedure several times to get the metal clean.
How do I use wax sticks or wax beads for a low temperature glue gun
To put many wax stamps of the same color, it is convenient to use a low temperature glue gun. Especially when there is no way to light a candle. It is better to have a separate low temperature glue gun for each color, as it is difficult to clean inside. Or apply similar colors.
To remove residue from the previous shade, pass a rod of clear glue.
Before you start making, plug the gun in and wait for it to warm up. Then place the necessary rod, squeeze out the mass necessary in shape and size and place the seal on top. It’s important not to let the sealing wax get too hot, so unplug the device from time to time.
How do I make a perfect wax seal
Not everyone is able to make round sealing wax impressions right away. Thanks to our experience, we’ve found a way to teach this skill. Do them not immediately on the package, but on a surface from which they can be easily removed. For example, use a cut stone or a silicone mat.
The finished wax stamp will stick off these surfaces well. If you don’t get a circle the first time, you can cut and reheat it in a spoon. We recommend using double sided stickers to attach the products to the packaging afterwards. They stick tightly to the paper.
Wax Seals for Kids
Wax seals are great for decorating homemade cards and hobbies like skeep booking and decoupage. To make one, you’ll need a sharp knife, a round wooden stick (such as a piece of an unwanted mop), and a wood poker tool.
Figure out what kind of picture will be the seal. It should be a small pictograph. You can practice by making stamps in the form of simple geometric shapes, such as a heart or a star. An interesting idea would be to make a wax stamp with your own initials. You can type them in a nice handwritten font in Word (such as Bookman Old Style).
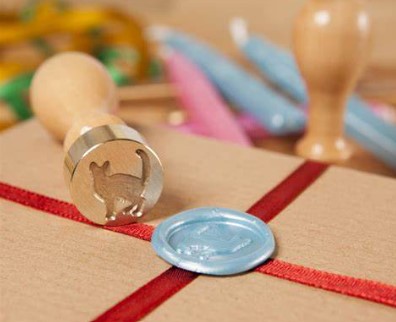
Sand the surface of the wax stick so that it is flat and smooth. Draw on paper or print from a computer a drawing that fits the size of the print plane. Use nail scissors or a paper cutter to cut out the outline of the design. The cut out should be the area that you plan to fill with paint. Press the resulting drawing against the polished surface and paint the wood with a simple pencil through the cut out stencil. Take a pyrography tool and make an indentation in the place of the stencil.
After that treat the surface with olive, wash it and leave it to dry for a few hours. The print is ready. The smoother and finer the outlines of the design, the more beautiful the print will be. It is important to choose a sealing wax of a bright, saturated color when creating the print.
How to properly pour the sealing wax
Light the candle wick. When the wax begins to melt, create a puddle of wax the size of the seal from the falling drops. Allow the puddle to cool for about 15 seconds and press the stamp against it. To keep the wax stamp from sticking, dip it in olive oil beforehand and wipe it off quickly.
Using wax seals on modern envelopes is not recommended. First, its oily base can leave greasy spots on the paper and ruin the letter. Secondly, it is more likely to cause a modern glued envelope to come apart than to keep it intact. There are special wax sticks that do not leave stains on the paper.
As you can see, it’s really not that difficult. As in any business, all you have to do is familiarize yourself with the materials, practice, and you will succeed.
After dealing with wax it shall be useful to read how to get wax off your skin.

